Chapter 7 - The Big Install
So this is it, we have an installer flash drive and our system configured how we like.
In this chapter we will…
- Boot into our installer image
- Wipe and prepare our disk for install
- Create a hardware config for our system
- Install NixOS!
- Cleanup after install
- Learn how to use NixOS on a real system
Booting The Installer
To get started, I’d recommend opening this guide on another device that you can look at while installing. For obvious reasons you won’t have access to this while installing.
Plug in the flashdrive, reboot you system to the boot menu (usually by spamming F12 while the computer is starting) and select the flashdrive from the boot menu.
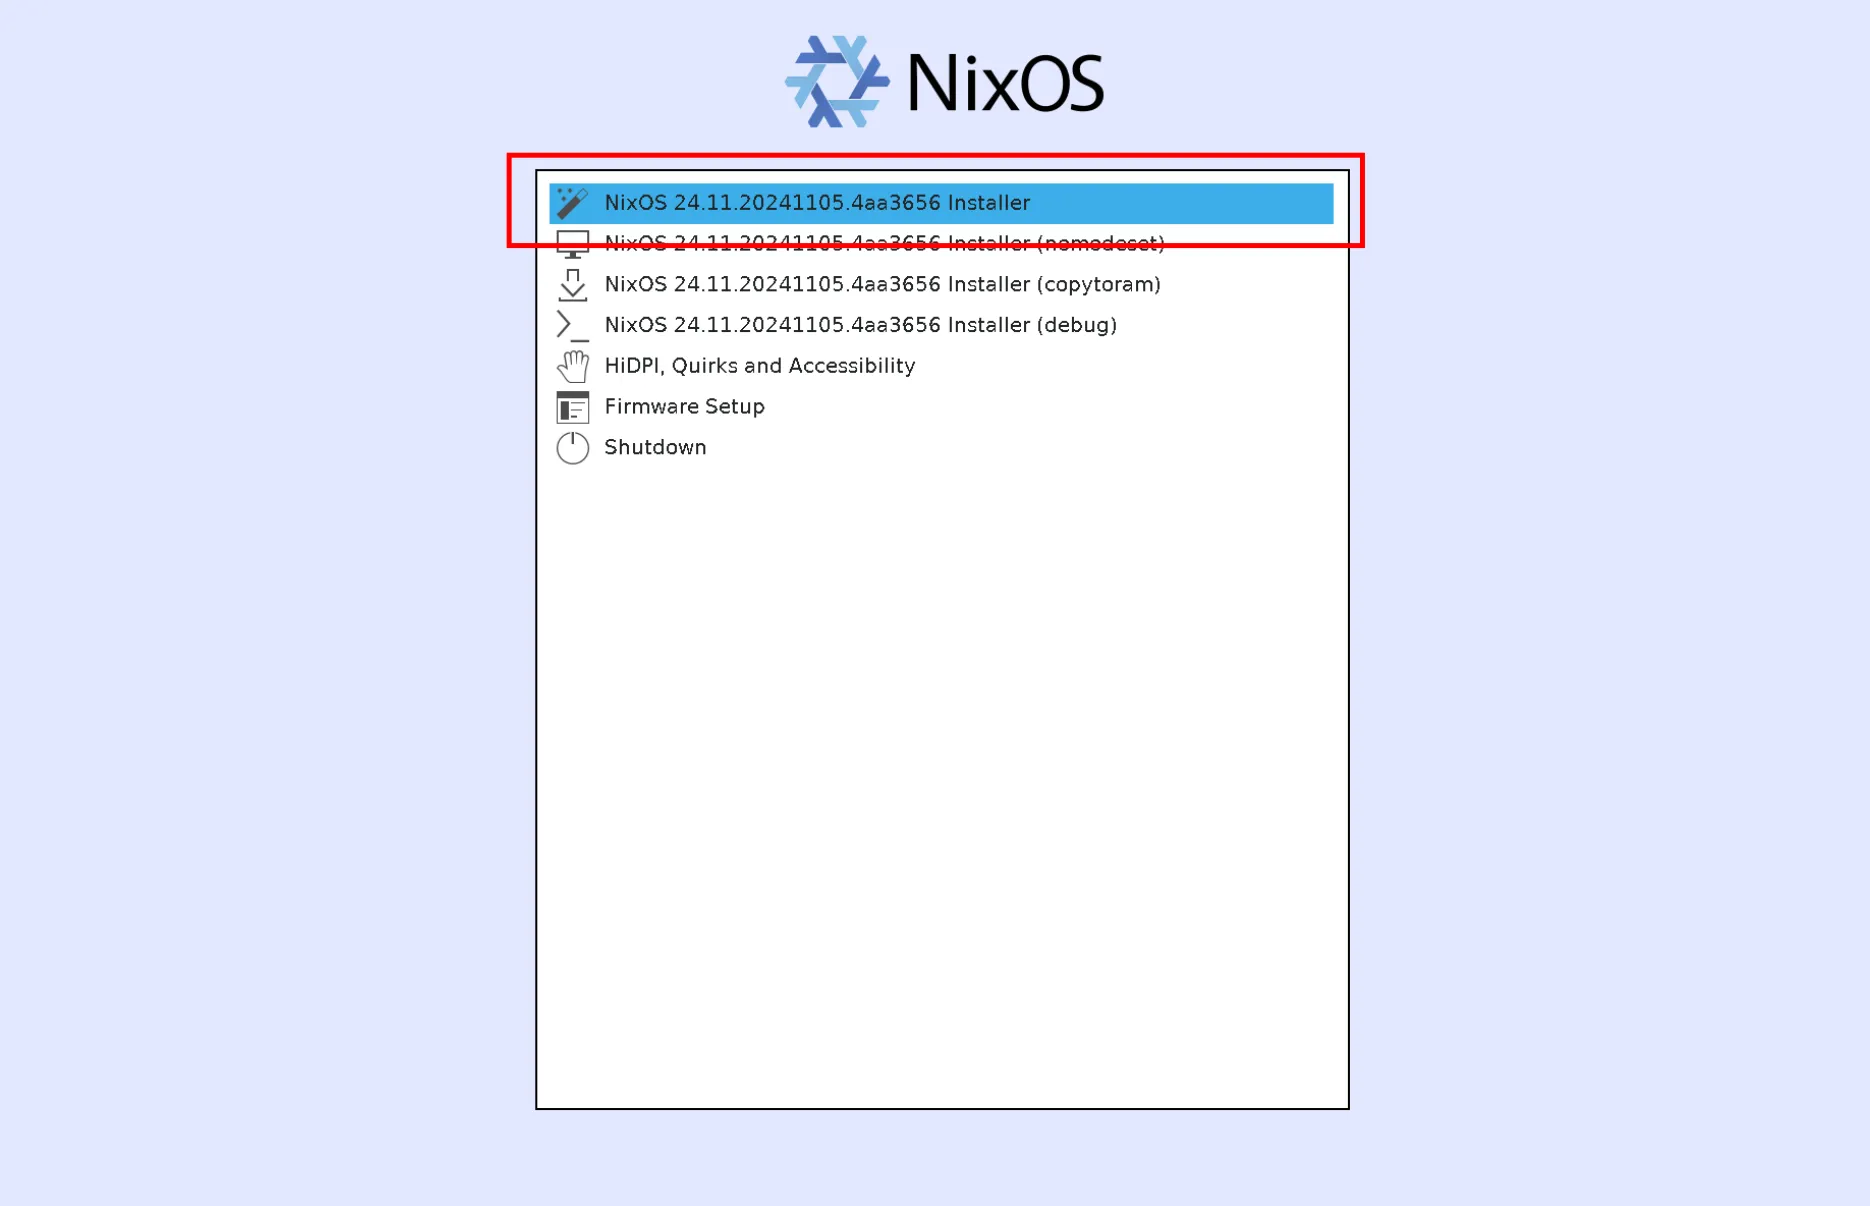
You’ll be shown a screen with the NixOS logo, select the first option and it should begin to boot.
After booting you’ll be greeted with a shell. The initial message goes over how to get wireless networking set up if needed, we’ll assume you were able to.
Disk Prep
First we need to get the main disk ready for NixOS. To do this we will have to wipe it.
To get started, find the block device path of your main disk. For NVME this will usually be /dev/nvme0n1, for others it may be /dev/sdX. You can use the lsblk command to find it based on size.
Now, run the following, replacing DEV_PATH with the device path.
sudo cgdisk DEV_PATHThis opens a interactive TUI for partitioning disks, we’ll use this to layout the disk for NixOS.
You’ll need to do a few things here.
- Delete any partitions present on the disk
- New partition, this will be the boot partition.
- Press Enter - Uses default start section for our new partition
- Enter
512Mfor a 512 MiB boot partition - For hex code enter
ef00, this marks it as a EFI boot partition - Name this
BOOTor whatever you want
- Next you can optionally set swap memory, if you do set this I’d recommend making it the size of physical memory you have.
- New partition (below the boot partition)
- Press Enter
- Enter the size you desire for the swap partition. (ex.
4Gfor 4 GB) - For hex code enter
8200, for “Linux Swap” - Name this
SWAPor whatever you want
- Finally allocate the rest of the disk space to your actual system
- New partition (below the other partitions)
- Press enter
- For size simply press enter, this will make it go to the end of the disk
- For hex code press enter (
8300), for “Linux Filesystem” - You can name this
NIXOSor whatever you want
- Your
cgdiskshould look something like this
- Finally select
[Write]at the bottom, this will commit all changes to the disk - Quit
Now we need to create filesystems on the new partitions we made.
When I put PARTITION_PATH in the commands below I don’t mean just the device path.
- For NVME drives a partition should be at
/dev/nvme0n1p#where#is replace with the partition number. - For SATA drives it should be at
/dev/sdX#where#is replaced with the partition number.
So with this in mind:
- Setup your boot partition (partition
1)Terminal window sudo mkfs.fat -F 32 PARTITION_PATH - If you did swap, Setup your swap partition (partition
2):Terminal window sudo mkswap PARTITION_PATH - If you did swap, Enable swapping
Terminal window sudo swapon PARTITION_PATH - Setup your main partition (
3if you did swap,2otherwise)Terminal window sudo mkfs.ext4 PARTITION_PATH -L NIXOS
Great! We’ve fully primed our disk for install.
Mounting Disks
Next we need to mount the disks we just created so we can write to them.
PARTITION_PATH will be the same as outlined above.
- Mount the main partition (
3if you did swap,2otherwise)Terminal window sudo mount PARTITION_PATH /mnt - Create the directory for the boot partition
Terminal window sudo mkdir /mnt/boot - Mount the boot partition (partition
1)Terminal window sudo mount PARTITION_PATH /mnt/boot
Our disks are now mounted for setup!
Getting our Flake
Almost ready now. But first, we’ll copy our system flake to our newly mounted drive.
- Make the folder to store the flake in
Terminal window sudo mkdir /mnt/flake - Copy the flake to our newly mounted drive, note the
/*! This copies the folder contents and not the symlink.Terminal window sudo cp -r /etc/flake/* /mnt/flake - Set the proper permissions so we can edit it
Terminal window sudo chmod -R 777 /mnt/flake
The layout of /mnt should now look like this.
Directory/mnt/ mounted to partition 3 (or 2)
Directory/mnt/boot/ mounted to partition 1
- …
Directory/mnt/flake/ our flake, ready to edit
- flake.nix
- …
Adding our Hardware Config
Now we need to add a hardware-specific module to our NixOS config for this computer.
This tells NixOS where disks are, what CPU we’re running, etc.
sudo nixos-generate-config --root /mnt --show-hardware-config > /mnt/flake/hardware-configuration.nixThis will generate hardware-specific config for your system. Take a look at it with cat to see what it does.
Directory/mnt/flake
- flake.nix
- …
- hardware-configuration.nix
Now add this new module to modules for your system in /mnt/flake/flake.nix (you can use vim here):
modules = [ ./modules/config.nix # ... ./hardware-configuration.nix];Now check one more time to make sure the system’s okay.
nix flake checkIf the flake check passed then we should be good to go!
Installing
Now for the big install. Replace YOURNAME in the following command with your system’s name:
cd /mnt/flakesudo nixos-install --no-channel-copy --root /mnt --flake ".#YOURNAME"This does a few things
- Don’t copy channels, we’re flakes all the way
- Set the root of the install to
/mnt, our main disk - Build our system from the current directory (our flake), a system called
YOURNAME
Press enter and wait for the system to build.
After the system builds fully, it will prompt you for a root password for the new system. Enter whatever you wish here (just don’t forget it).
NixOS is now installed! Before rebooting:
cd /sudo umount /mnt/bootsudo umount /mntFinally
sudo rebootYour system will then reboot! Take out your installation medium now.
First Boot
The system should initialize and reach some sort of greeter (logind, tuigreet, SDDM, GDM, etc depending on what you set up).
Before attempting to login (you can’t). We need to set your user password.
- (If you have a graphical greeter): Switch TTYs with
Ctrl+Alt+F2. (You may need to holdFnas well on a laptop) - Login as
rootwith the password you setup in the installer - Run
passwdto change your user accounts password. ReplacingYOURUSERwith you user account’s name.Terminal window passwd YOURUSER - Enter the password you wish to use
- Logout with
exit(or pressCtrl+D) - (If you have a graphical greeter): Switch back to TTY 1 with
Ctrl+Alt+F1
Now log in to your new system!
Post-Install Config Housekeeping
Grabbing Our Flake Again
After logging in I’d recommend grabbing your flake from /flake and copying it to somewhere in your home folder for editing. The flake will no longer have a git repo associated with it so you may need to re-run git init.
Either way make sure to commit your new hardware-configuration.nix file and push if applicable.
You can remove /flake once you’re done this.
Disable the QEMU Guest Agent
We don’t need QEMU guest agent anymore as we’re on the read deal now.
# ...services.qemuGuest.enable = true;# ...You can also optionally remove the vm recipe from your justfile
# ...
[private]alias vm := run-vm# f: run VM of testrun-vm:    nom build .#nixosConfigurations.YOURNAME.config.system.build.vm    nix run .#nixosConfigurations.YOURNAME.config.system.build.vm
Organizing hardware-configuration.nix
Finally, we placed hardware-configuration.nix in the root of the repo for simplicity, but feel free to move it to wherever you like (maybe make a folder for different hardware configs and name it your system name).
- flake.nix
- flake.lock
Directorycomputers/
- YOURNAME.nix
Directorymodules/
- config.nix
- …
Working In NixOS
Now that we’re fully in NixOS we need to know a few more things.
Switching
Switching is the process of pointing your running system to another config and activating it.
sudo nixos-rebuild switch --flake .#Notice how we don’t need a name here, it’ll look for a config that matches the system’s hostname by default.
For convenience this is in your justfile, to rebuild and switch to a new config, run just s.
Building
Of course you don’t always have to switch, you can also just build the system without switching.
nom build .#nixosConfigurations.YOURNAME.config.system.build.toplevelReplace YOURNAME with your system config’s name. This is also included in your justfile, run just b to build your system.
This is nice for when you’re making a big change and don’t want to change immediately.
Updating
Something we never really talked about was updating. Updating NixOS is as simple as changing with commit of nixpkgs we pull.
Nix can automatically update all inputs to their latest commits with flakes.
nix flake updateYou can also use just u as a shortcut.
Garbage Collection
You’ll also need to be able to garbage collect so you have plenty of free disk space.
nix-collect-garbage -dsudo nix-collect-garbage -dNote that these do two different things and should both be run. You can also use just gc as a shortcut.
Rollback
When booting, systemd-boot will display all previous NixOS generations, you can boot from any one of these.
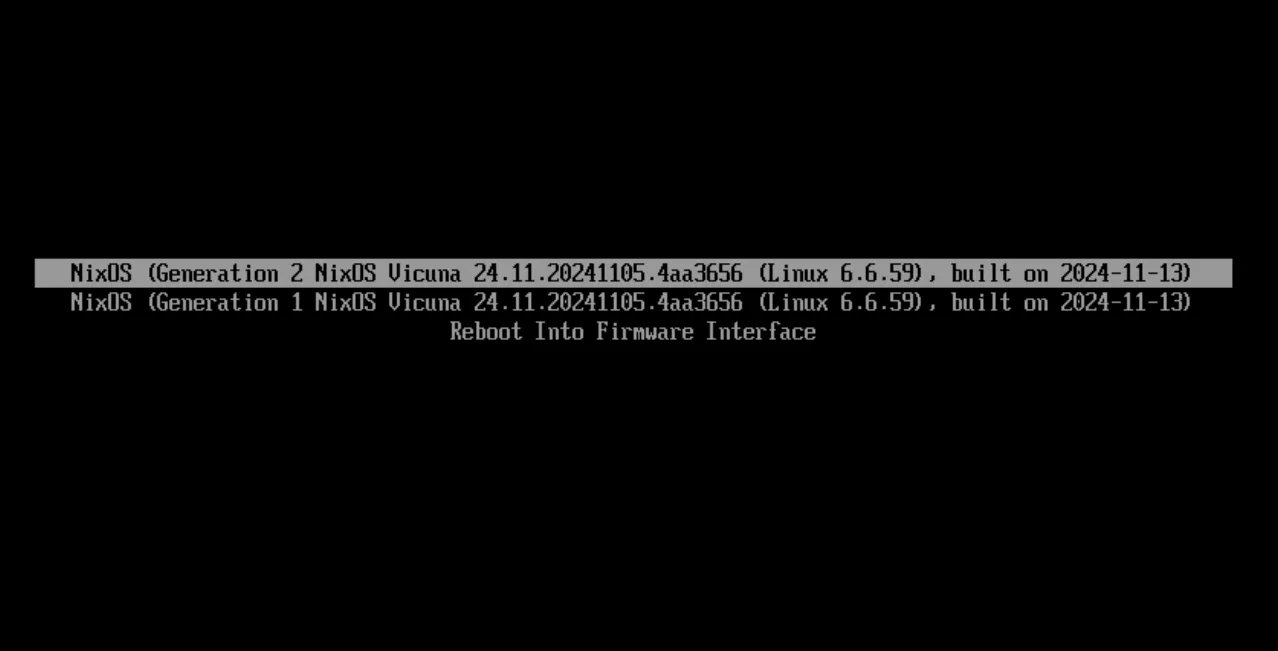
This is very handy if you mess up your most recent config to be unbootable. With NixOS as long as you don’t mess up your bootloader you can usually recover easily.
Also remember that you have a git repo to track your config, you can always rollback to a previous commit if needed.
Running Non-NixOS Binaries
If you ever need to run binaries off the web without needing to setup an FHS, you can use steam-run (from the steam-run package) to run the binary.
steam-run ./my-binThe Story Doesn’t End Here
Congrats on installing NixOS! Hopefully this guide has given you the tools you need to continue growing your config and joining the rest of us delusional people in trying to make our systems perfect.